

Every season I like to create a new wreath to add to my welcome area at home :) This year, I tried to think of something that I could create easily and on the cheap but still be cute and original.
After making a ton of tissue paper pom-poms for my art classroom, I decided how cute would a wreath made out of these be?? Answer...soooo cute!!
So, here is a little DIY tutorial for all of you to use if you would like :)
Materials needed:
* 1 wire hanger
* red tissue paper
* yellow tissue paper
* orange tissue paper
(obviously, all of those colors could be substituted to fit what you want :D)
* masking tape
* tie wraps/wire
Step One- Cut your sheets of tissue paper 6 inches square and make piles of your tissue papers in the like colors.

Step Two- Gather eight sheets of one color of tissue paper (for this tutorial I will be using orange for my example). Stack the 8 pieces of orange tissue paper on top of each other and begin to fold it like a paper fan :)

Step Three- Secure your "fan" with a twist tie/piece of thin wire in the middle.

Step Four- Use your scissors to round the edges of your "fan." This will give it a beautiful scalloped look when you are finished with it.


Step Five- Repeat steps 1-4 with 9 different stacks of tissue paper.

Step Six- Lay your "fan" on it's side and "fan out the edges to look like so:

Step Seven- Pull one layer of tissue paper up at a time and pull it towards the middle while you are doing it...

Step Eight- Continue to pull up each piece of tissue paper, layer by layer until you get a large, poofy tissue paper flower :)


Step Nine- Continue to turn each of your "fans" into tissue paper flowers!


Step Ten- Stretch your wire hanger out to create a circular shape for your wreath base :)

Step Eleven- Use the masking tape to adhere the tissue paper flowers to one side of your hanger. I formed an "x" with the masking tape so that each one is held on firmly!
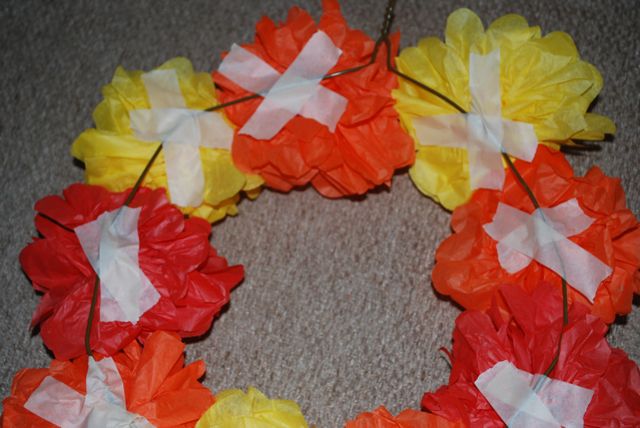

Step Twelve- Flip it over and admire your work!!! You now have an adorable, affordable, DIY, cutie pie Fall Wreath to help you welcome the loveliest of all seasons!

Step Thirteen- The best part about using a wire hanger is now you have a perfectly easy, already made, hanging hook. Hang your wreath and enjoy!!

Remember you can use any color of tissue paper and use this wreath for any occasion that you would like!! If you decide to create one of these wreaths yourself, please link it to me so that I can check it out!! You can also add a photo of it to the Run With Scissors Flickr group!! I would love to share some of your creations on my blog!!
Have fun!!
xo
janel
xo
janel


very cute!!! I love it!!!!!
ReplyDeletexoxo,
Lindsay
cute!
ReplyDeleteI love making those little "puff" things, and this is such a great way to use them!
ReplyDeletethat is adorable! and I literally just posted a pic of an orange pom pom I made! great minds.... :)
ReplyDelete♥kayla
www.themindwandering.blogspot.com
too cute! Reminds me of when we were in school we used to make these flowers but never made a wreath out of them..clever idea.
ReplyDeleteI see you have a great camera collection...awesome!!
♥♥♥♥ this!!
ReplyDeleteP.S....We are doing a craft with the kids at Loaves and Fishes tonight. Any chance you are available?
Love this! I can't wait to make black and orange ones and add some spiders for the Halloween party!!
ReplyDeleteawe! so cute! thanks for sharing!
ReplyDelete♥ allisterbee.blogspot.com
this is lovely!
ReplyDeleteBTW, I nominated you for a blog award here:
http://punkprojects.blogspot.com/2010/09/sunshine.html
xo,
Katie
i <3 this & will totally be making one soon!!
ReplyDeleteGreatings, Super post, tienen que marcarlo en Digg
ReplyDelete[url=http://www.hosbakd.com/]Doggy[/url]