17 August 2011

calling all journal-ers!!

I am excited to announce that I am now offering all four of my past online journal classes in my etsy shop!!
If you missed out on any of these classes, they are now open to YOU for the reduced price of only $15 each!!

*Although the actual class is over, this listing is for access to the online class where you can find all of the prompts, techniques, and challenges. You will also have access to the 
Flickr grop, chats that we had, and comments!!*

We are talking 9 whole weeks of journal prompts, fall decor ideas, and recipe swaps!!
I seriously can not think of a better way to celebrate one of the greatest seasons out there!!


Join us for a 30 Day journal challenge jam packed with creative prompts, techniques, \and of course an amazing community of online friends :)

 This is my first 30 day journaling class.  30 days full of journal prompts, techniques, chats and more!!
These prompts will focus us on a new year, new season, and new chapters of your lovely lifes. I'm so excited!!

All of the proceeds from these classes will go directly towards our adoption!!  I hope you join me in these challenges!!
Check out the etsy listings for each to see page examples from each class :)
They are a lot of fun!

xo
janel

16 August 2011

home study


Tomorrow is our first official "Home Study."  This is where our social worker will come to our house, check it out, make sure it's safe, baby appropriate, and such.
We will also be interviewed separately and as a couple.
If you think about it, please say a little prayer for Adam and I tomorrow as we venture through this journey.
thank you and love you.

xo
janel

14 August 2011

back to school

In honor of school starting tomorrow, I thought I would share with you some "art class" pins from pintrest. 


I think I might have to use some of the ideas to make posters for my art classroom :)
Wish me luck tomorrow!!

xo
janel

13 August 2011

saturdays are for sewing...


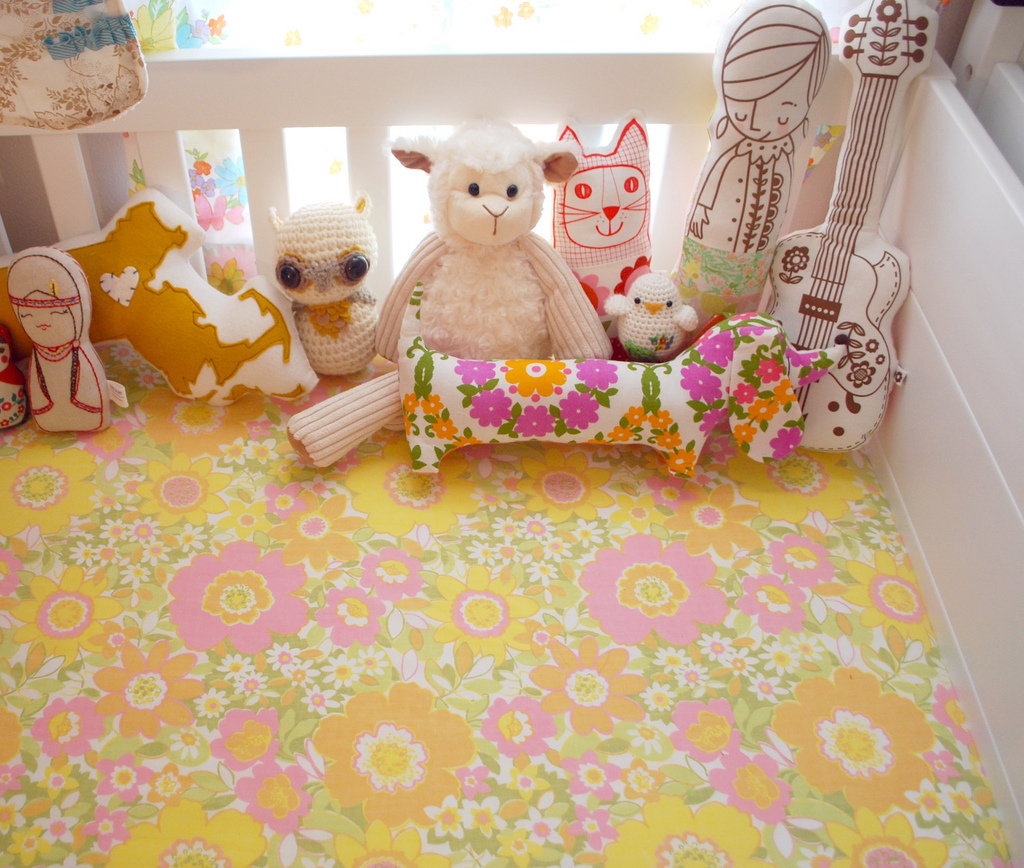
Time to check another thing off of my "DIY baby" list.  Today I decided to try my hand at a DIY crib sheet.  As you can probably tell, I am going for a vintage floral theme in the nursery and handmade feel.  I had scored this vintage sheet some time back and decided that it was the perfect pattern for the crib sheet.
Well, I tried...and succeeded!
Here it is in all of it's vintage floral glory:


Yes, yes, I love it a lot!!
What do you think?

xo
janel

12 August 2011

a baby quilt

The other day I made a baby quilt for the little one.  It was so easy and literally took about an hour to do the entire thing.  I really love it a lot. 
Before I share photos of that, here are some more little nursery peeks:


I hung all of the bibs up so that Adam could see them when he came home.  I think Im going to keep them hanging for awhile.  It's kind of like a cute little bunting :)


And here is the quilt...


I made the quilt using this tutorial.  You should check it out.  It's so easy!

xo
janel


11 August 2011

Missoni for Target

Let's take a little break from all of the baby blogging for a second to talk about the new Missoni line for Target.  I haven't been this excited since Orla Kiely was at Target!!
Let's just take a look at the amazingness that is Missoni...


Oh yes please!!
I will be there on September 13 for sure. I am in love with everything. This could be dangerous :)

xo
janel

10 August 2011

handmade bibs...

Well, school starts tomorrow so this is probably the last of my "nesting" projects for awhile.  It's crazy how exhausting the first few weeks of school can be; a good kind of exhausting but still exhausting :)
I decided to stay home today and work on sewing up a few handmade bibs for my some day baby. I love the way they turned out.  
And again, this is such an easy and quick, personalized gift.
Here are mine:


It's unreal how rewarding it is to create something so lovely for someone that you love so much!  It's also so unreal how much I love this child already and I have no idea who or where they are.  
I can't wait to be a mom!!!

xo
janel

09 August 2011

onesie love

In continuing with my newest obsessions (getting ready for baby and sewing) I decided to embellish some plain onesies that my mom had picked up for me. 
There are so many cute things that you can do with plain onesies and I had a blast fixing these up!
Here is what I came up with...

1.  A little vintage fabric ruffle down the center

2.  vintage doiley neck line

3. diagonal double ruffles with vintage fabric

I also did a Suki iron-on on one of the onesies with button embellishments but apparently I didn't get a photo of that one by itself.


And...I finally hung up my sweet little bamboo mobile that I scored on Gilt a few weeks ago!


I'm pretty sure that I am faux-nesting right now :)
I guess this is a symptom of adoption too, not just pregnancy.
I am just having so much fun making things for my someday baby.
love it so much.

Tonight I started sewing up bibs...they are soooo cute.  I will post photos as soon as I can.
Tomorrow is officially my last day of summer vacation.  I go back to work on Thursday. I'm deciding if I should go and work on my classroom tomorrow or if I should spend it at the pool and sewing?
What do you think?

Have a lovely night.
xo
janel

08 August 2011

pillow case curtain DIY


When I am hit with inspiration, I like to execute a project right way.  With that being said, the second I decided that I wanted to make curtains, I had to do it, right then.
I got my scissors, my sewing machine, and measuring tape ready when I remembered that I had NO sheets of fabric at my house.
(a lot of my craft stuff is being stored at my parent's house right now as I turn my studio space into a nursery)
This was a problem.
Since I knew I had to make the curtains right that second, I had to come up with a solution.  
I didn't have fabric but what I did have was two vintage pillowcases.


That is the only fabric that I had in the whole house!!  I decided to do some brainstorming and eventually came up with tutorial for myself :)
2 pillowcases=1 curtain.
In less than an hour!
Here we go!!

Materials Needed:
* 2 pillowcases of choice
*  fabric shears
*  sewing machine
*curtain rod
* spool of lace/ribbon/rick rack
*  measuring tape

Note:  I measured my window, which was 24x60 and decided that an "open" pillow case was just about double my width so it was perfect.
This probably wouldn't work well for a window much wider than that.

Here are the steps:

1.  Choose two coordinating pillowcases


2.  At the opening of each pillowcase, make a small cut on the seam and rip upwards to open up your pillowcases.  You will also need to do this with bottom edge.  Now your pillow case should look like this:

Notice the folded over edge at the top which is open on each end and ready for a curtain rod to go through? Nice!

3.  Lay your pillowcase on top of each other with right sides facing in.  Make sure that your folded edges match up.


4.  Sew the bottom edge (opposite of the folded edge) together to create one long panel of fabric.


5.  Your panel now has a crazy seem right smack dab in the middle :)  While I was doing this I remembered something that I read in a book once about The Great Depression :) During the Great Depression people couldn't afford new dresses when they grew so they added a panel of fabric to the bottom.  To cover that ugly seam, they would usually sew a piece of lace or rick-rack over the seam so it conspicuously looked like a new/longer dress.
(Thank you Kit Kittridge of the American Girls series)
I chose a spool of vintage lace...


6.  and sewed it right on top of that seam...


7.  Next I folded and pressed each raw side of my curtain at about 1/4 of an inch and sewed those down.  Make sure to leave your already made curtain rod sleeve open at the top.  The bottom of your curtain doesn't need to be hemmed either because it's already folded and sewed too from when it was a pillow! Score!

8.  Now that all of your raw edges are nice and clean and your middle seam is covered with something pretty, you are ready to slip your curtain rod in and hang your new curtain!!


So quick and sooooo easy to make!  Plus, you don't have to go out and buy any materials for this at all!  I really like the way it turned out and it made me really happy to throw those ugly blinds away that were hanging in there.  
Today, I am going to work in my classroom and then hit up a fabric store so that I can buy more terry cloth so I can make some BIBS!!
yay!

xo
janel